Using Globus
File Manager
After you’ve signed up and logged in to Globus, you’ll begin at the File Manager.
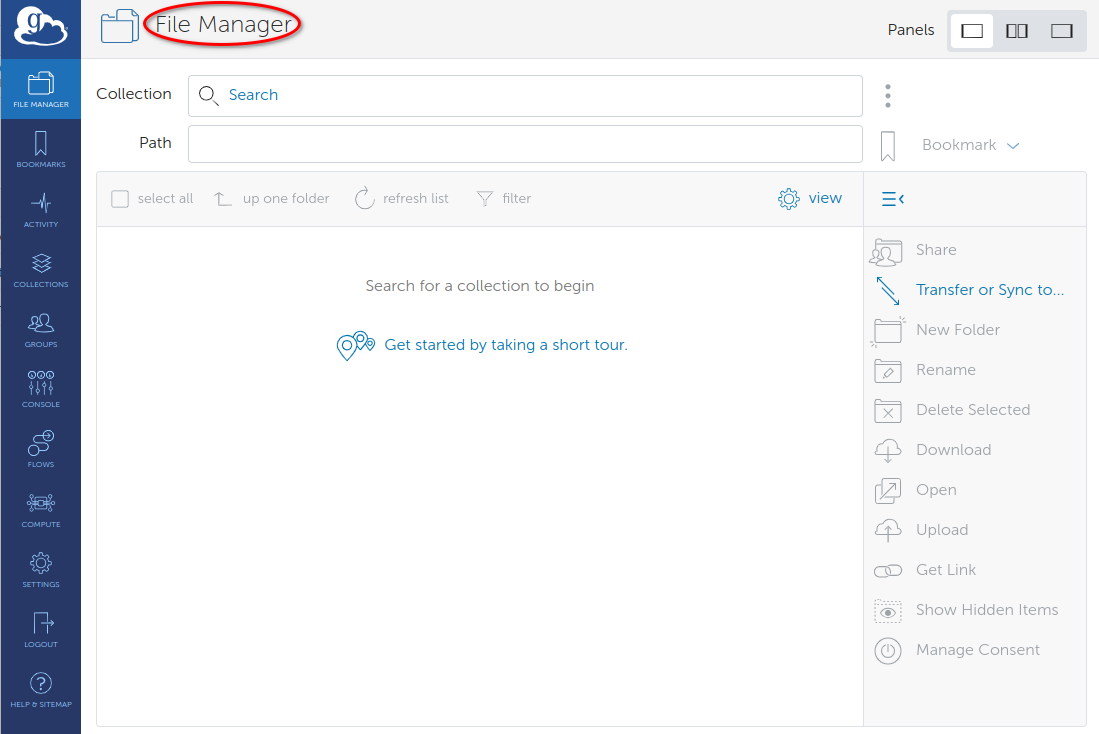
The first time you use the File Manager, all fields will be blank.

Tip: Collection
Key Concept: Collection
A collection is a named location containing data you can access with Globus. Collections can be hosted on many different kinds of systems, including campus storage, HPC clusters, laptops, Amazon S3 buckets, Google Drive, and scientific instruments. When you use Globus, you don’t need to know a physical location or details about storage. You only need a collection name. A collection allows authorized Globus users to browse and transfer files. Collections can also be used for sharing data with others and for enabling discovery by other Globus users. Globus Connect is used to host collections.
Access a collection
CELS currently has two endpoints: “CELS GCE Endpoint” and “CELS GCE Box Storage Endpoint”, you will need to Click in the Collection field at the top of the File Manager page and type either the full name of the endpoint, or “cels gce” and the file manager will show you both endpoints. Both collections are administered by the CELS IT Team and are available to all GCE users.
-
-
- If you click on the “CELS GCE Box Storage Endpoint”, Globus will list all your Box files as shown below:
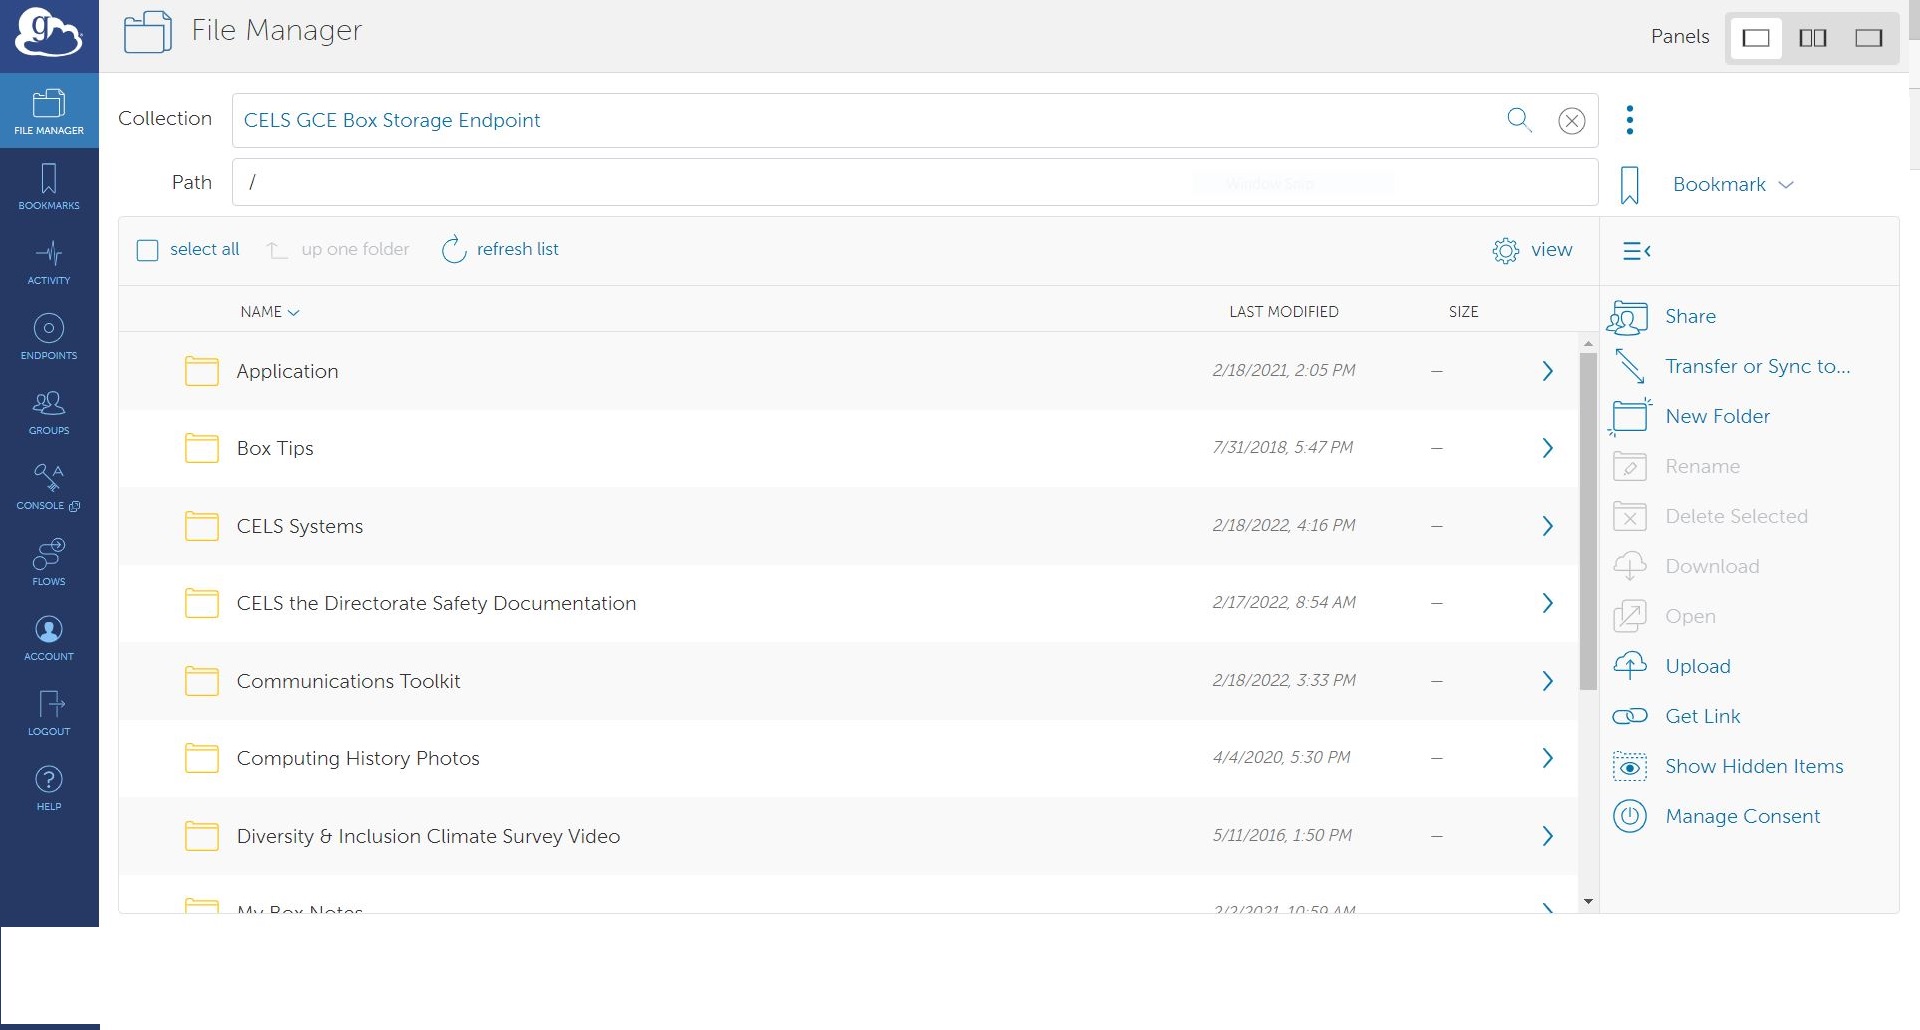
- If you click on the “CELS GCE Box Storage Endpoint”, Globus will list all your Box files as shown below:
- If you click on the “CELS GCE Endpoint”, Globus will list your GCE account files. If you do not have a GCE account, you can request one here: Requesting a GCE Account
-
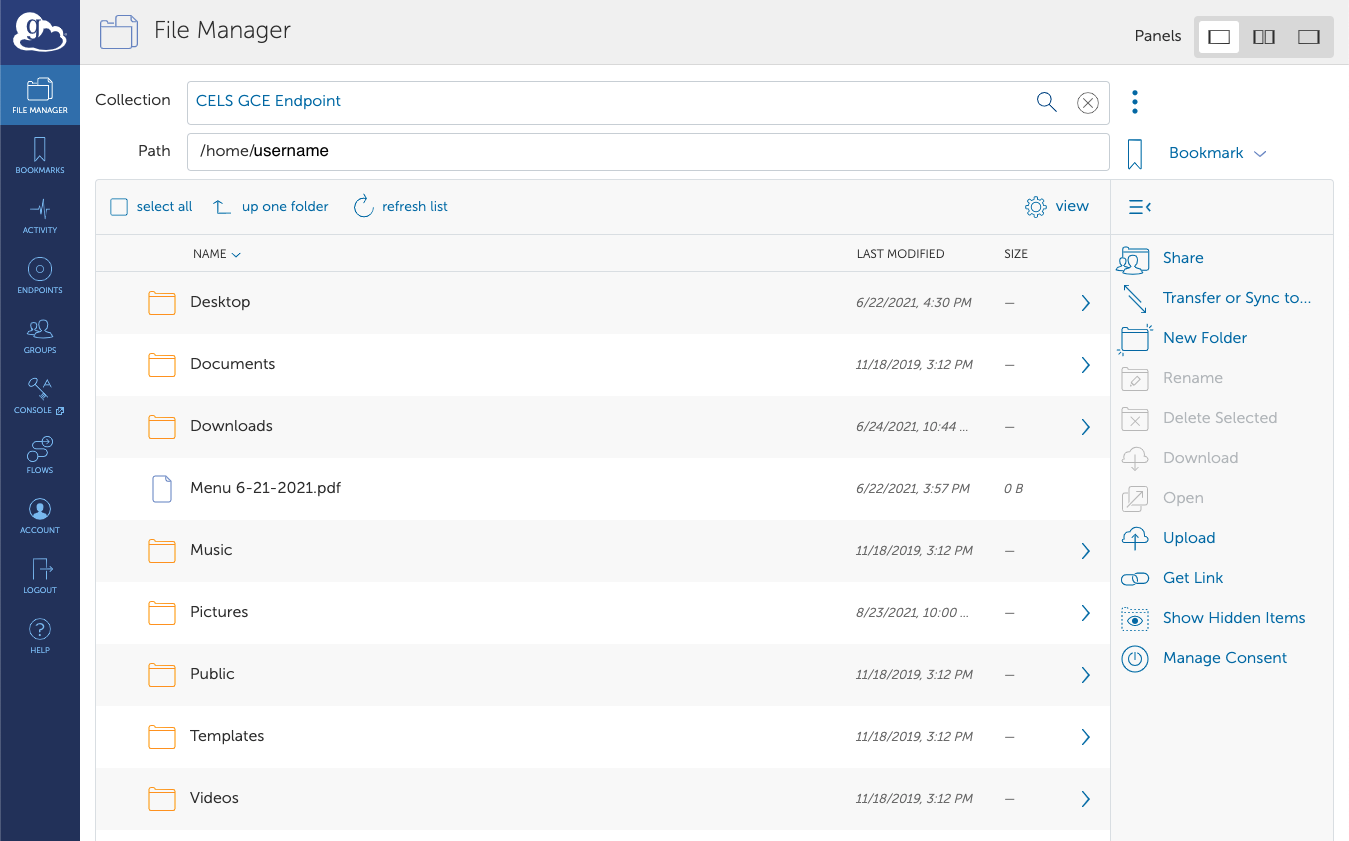
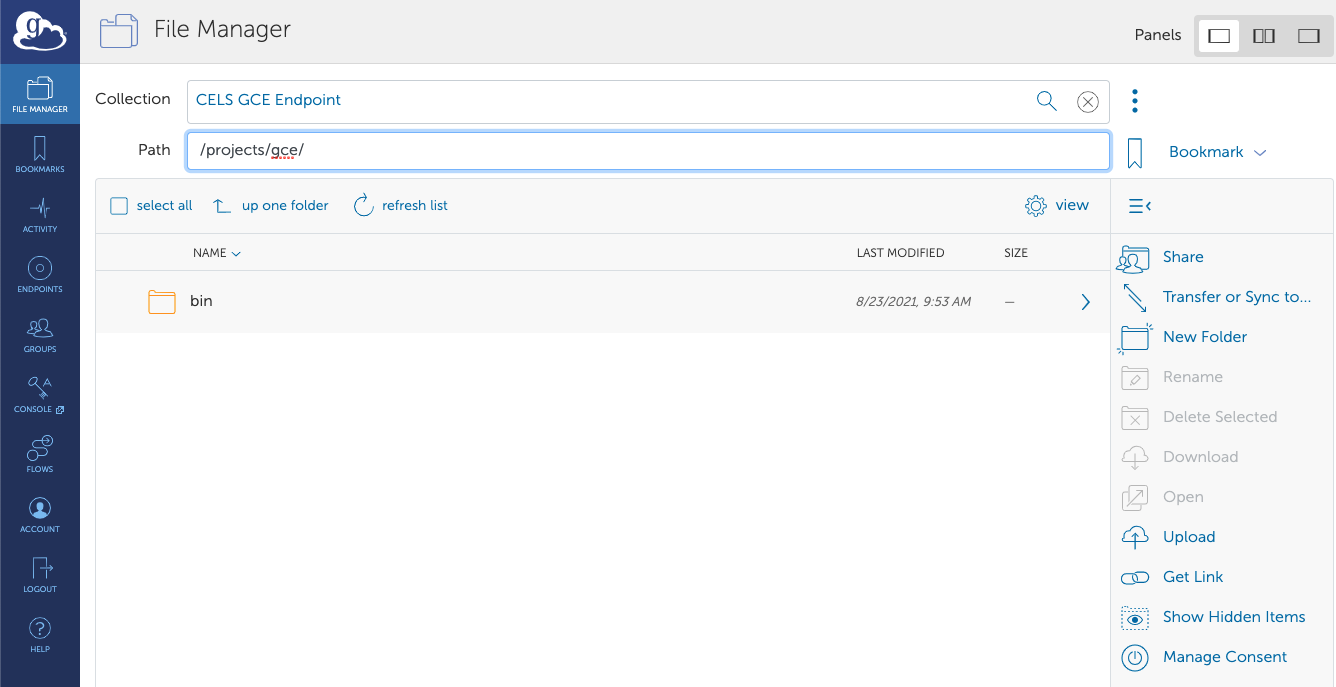
The CELS GCE Endpoint has two available directories: /home/ and /projects/. Globus will connect to the collection and display the default directory, /home/yourusername. To change to a project you are working on, click the “Path” field and change it to /projects/projectname/. Globus will then show the files and folders in the selected project folder as long as you have access to it.
Request a file transfer
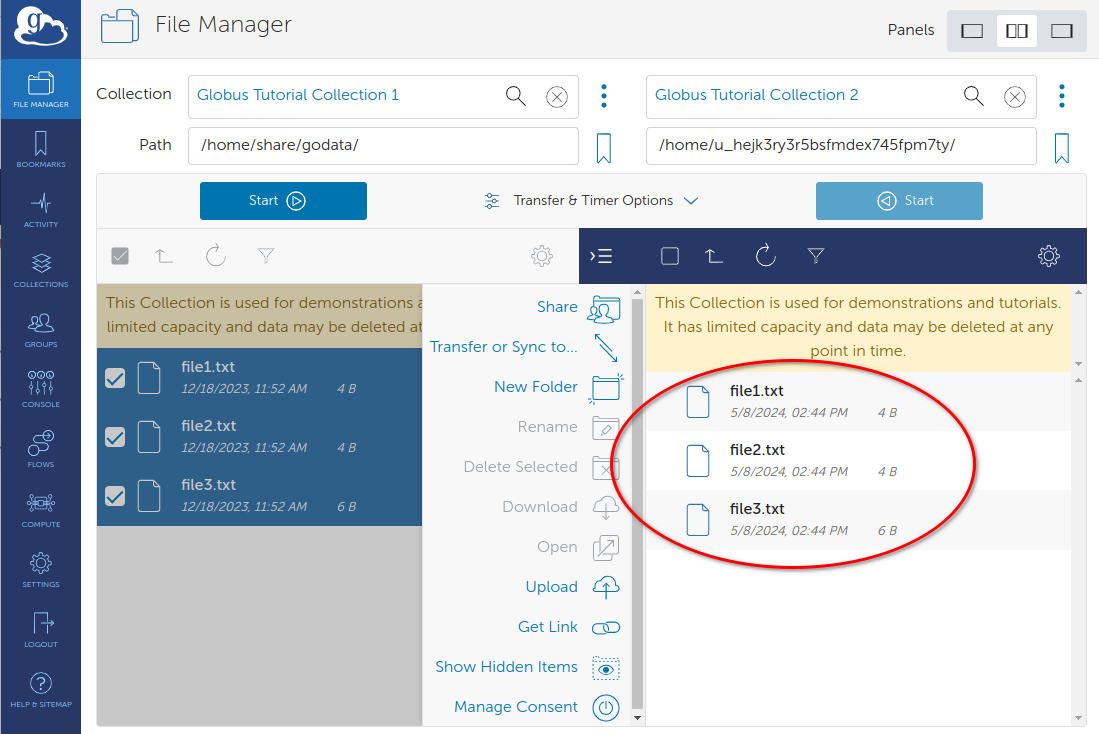
The following image gives an example for the 3 steps that are involved in requesting a transfer between “CELS GCE Box Storage Endpoint” and “LCRC Bebop Data Transfer Node Endpoint”. Please note that the image below shows another browser instance where you logged in to Box in order to illustrates that both Globus File Manager and Box show the same files.
![]()
The above method can also be used to transfer files from your Personal Endpoint to any of the available directories under “CELS GCE Endpoint” or your Box folders under “CELS GCE Box Storage Endpoint”. You can also transfer files between the two CELS GCE Endpoints available directories/folders.
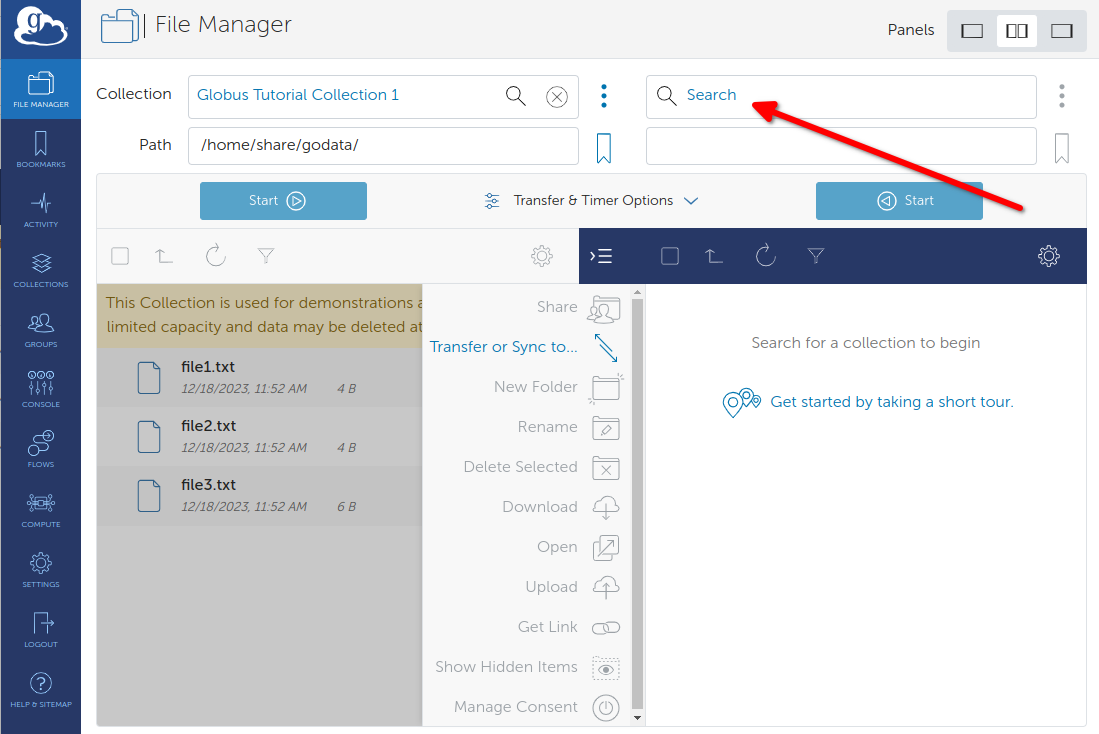
Click Transfer or Sync to… in the command panel on the right side of the page. A new collection panel will open, with a “Transfer or Sync to” field at the top of the panel.
Find the Globus Tutorial Endpoint 2 collection and connect to it as you did with the Globus Tutorial Endpoint 1 above. The default directory, /~/ will again be empty. Your goal is to transfer the sample files here. Click on the left collection, Globus Tutorial Endpoint 1, and select all three files. The Start> button at the bottom of the panel will activate.
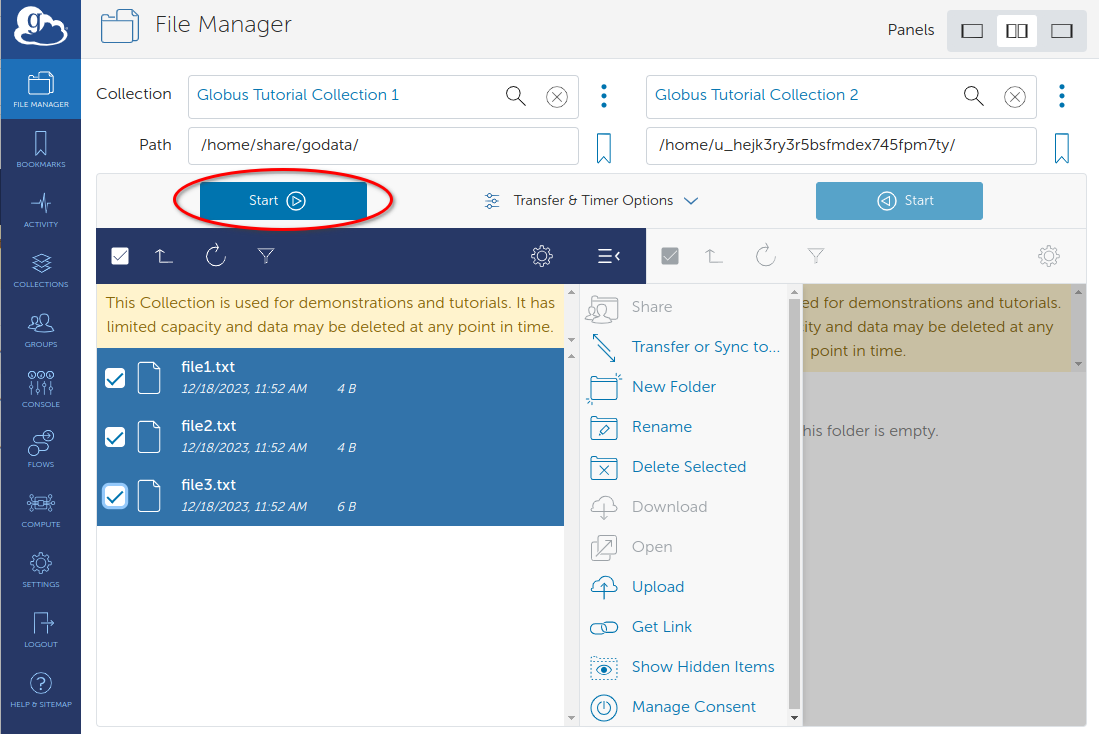
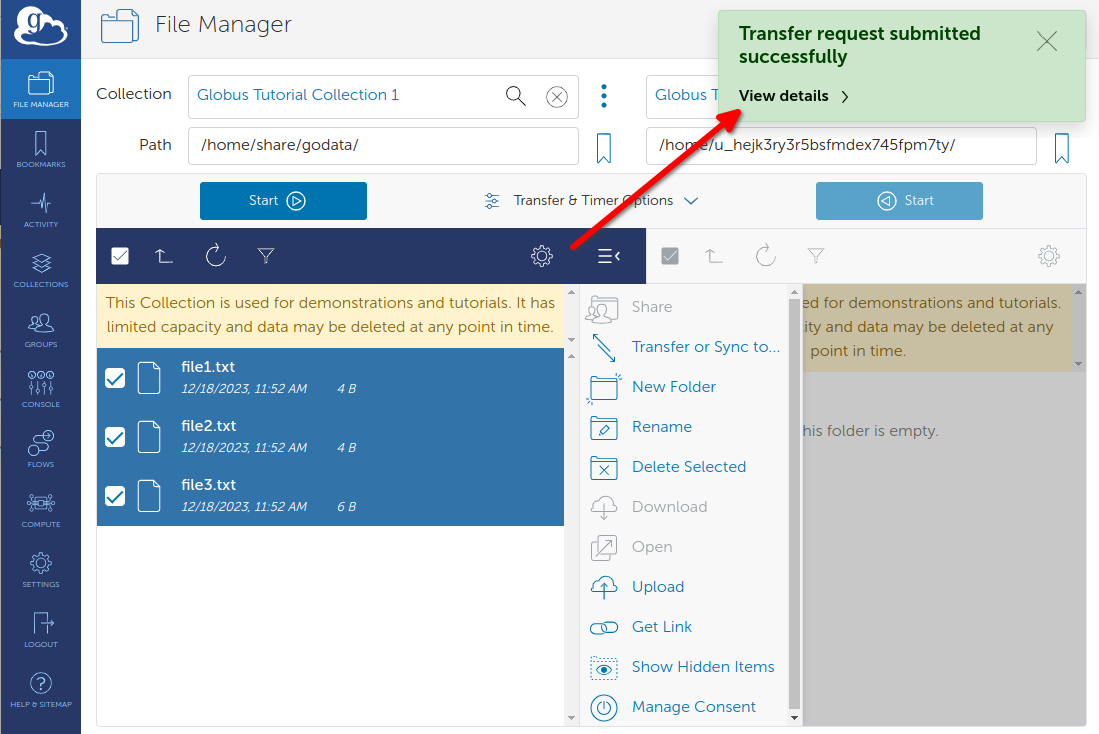
Between the two Start buttons at the bottom of the page, the Transfer & Sync Options tab provides access to several options. By default, Globus verifies file integrity after transfer using checksums. Click the information icons for explanations of the other transfer settings. Globus gives you powerful control over the behavior of the transfer with a simple mouse click. Change the transfer settings if you’d like. You may also enter a label for the transfer, but this isn’t required.
Click the Start> button to transfer the selected files to the collection in the right panel. Globus will display a green notification panel—confirming that the transfer request was submitted—and add a badge to the Activity item in the command menu on the left of the page.
Tip: Fire-and-Forget Data Transfer
Key Concept: Fire-And-Forget Data Transfer
After you request a file transfer, Globus takes over and does the work on your behalf. You can navigate away from the File Manager, close the browser window, and even logout. Globus will optimize the transfer for performance, monitor the transfer for completion and correctness, and recover from network errors and collection downtime.
The Globus service routinely achieves high availability, providing nearly uninterrupted oversight of data transfers taking place on much less reliable networks and collection hosts. When a problem is encountered part-way through the transfer, Globus resumes from the point of failure and does not retransmit all of the data specified in the original request.
Globus can handle extremely large data transfers, even those that don’t complete within the authentication expiration period of a collection (which is controlled by the collection administrator). If your credentials expire before the transfer completes, Globus will notify you to re-authenticate on the collection, after which Globus will continue the transfer from where it was paused.
These wide-ranging capabilities make data transfer with Globus truly “fire-and-forget.”
Confirm transfer completion
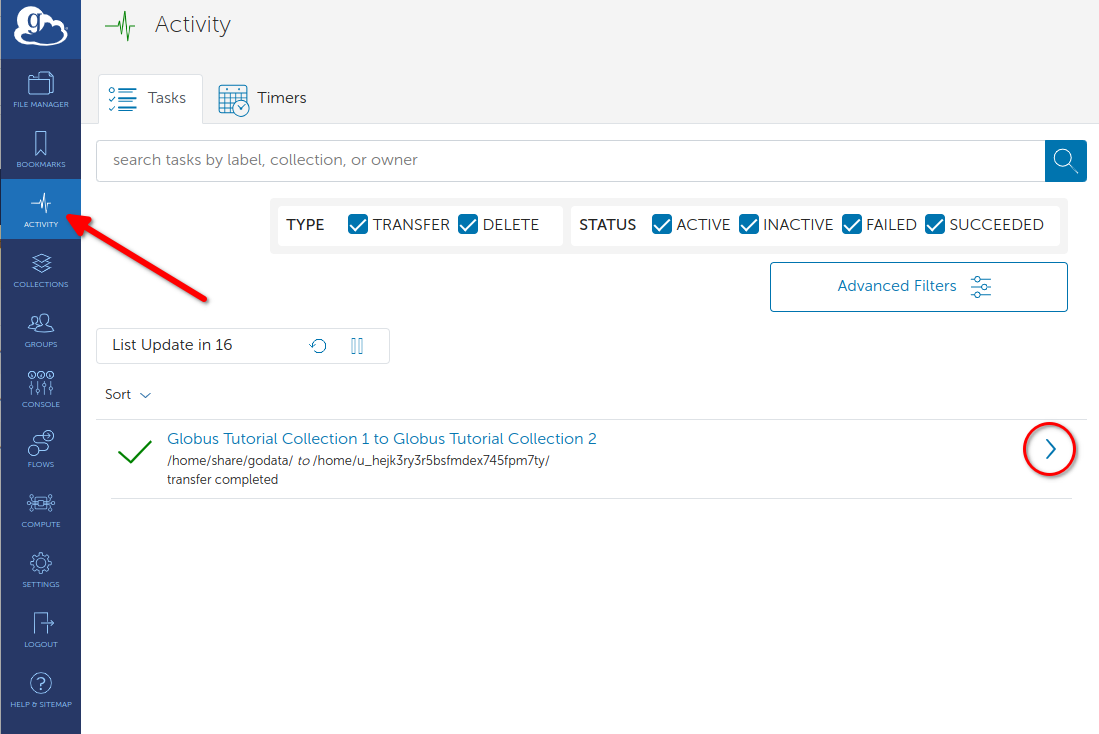
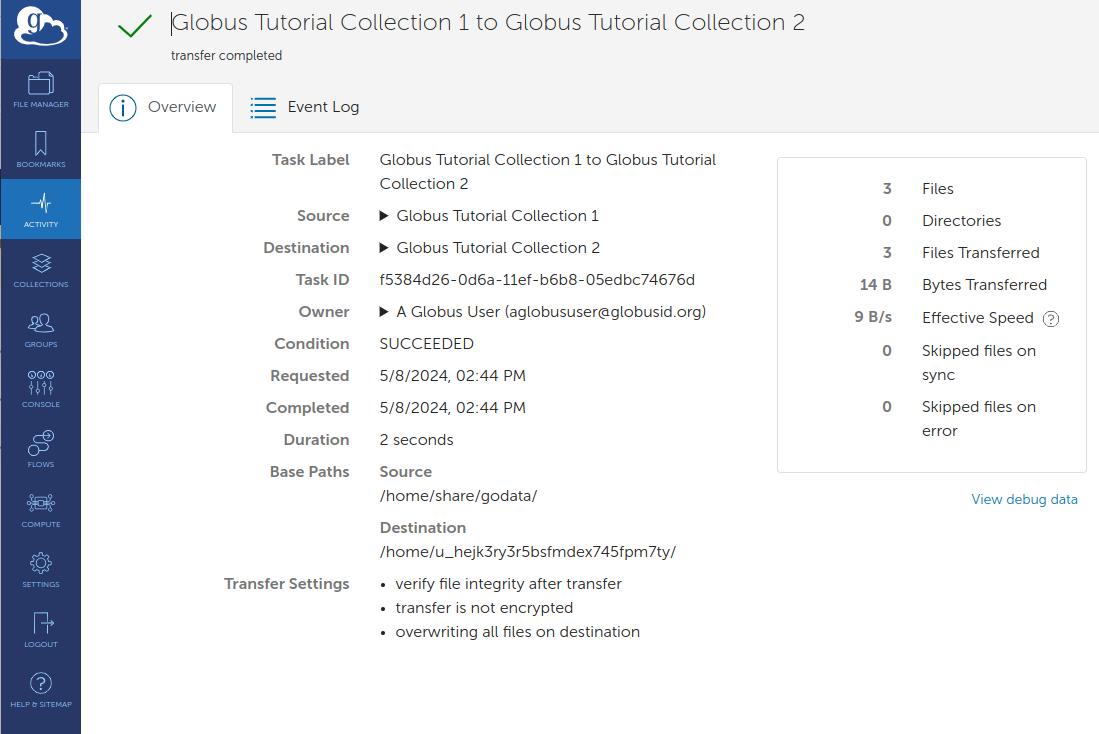
Only three small files were transferred in our simple example, so the transfer will complete quickly. Click Activity in the command menu on the left of the page to go to the Activity page. On the Activity page, click the arrow icon on the right to view details about the transfer. You will also receive an email with the transfer details.
Click File Manager in the command menu on the left of the Activity page to return to the File Manager. The collections you were viewing before will reappear. You may notice that the transferred files are not listed in the right panel with the Globus Tutorial Endpoint 2 collection and the /~/ path, even though the transfer has completed. Click the refresh icon (circular arrows) at the top of the collection panel to see the updated contents.